 You wanna add a Z-Wave light switch to Alarm.com? Today we’re gonna be going over just that. Also, we’ll cover the Z-Wave light status feature on alarm.com. First you need to learn about the Z-Wave light status feature.
The Steps Summarized
- First, you need to remove the Z-wave light switch from the network.
- Then put your SEM into enrollment mode and activate the inclusion function on the Z-Wave switch.
- When this is done, the lights on the SEM module should indicate that a Z-Wave device has been added.
You can connect your compatible hardwired alarm system to the Alarm.com network using the Alarm.com System Enhancement Module (SEM). This module has a built-in Z-Wave controller so you can use Z-Wave smart home devices with the system.
However, you won’t be able to control Z-Wave devices locally – all Z-Wave operation must be done through Alarm.com, either through a web browser or with the Alarm.com Mobile App on iOS and Android devices.
Adding the Z-Wave light switch Step by Step
Clear the Z-Wave device
Many times, a Z-Wave device is added to a network prior to leaving the factory – so it’s always best practice to clear it from any existing networks before beginning enrollment to make sure the Z-wave light switch can be added properly.
To do this follow theses steps:
- Press and hold the Z-Wave button located on the ADC SEM board directly above the orange antenna. When LED L2 light flashes in groups of four, let go of button.
- Now press and hold it again until LED L2 light flashes in groups of two – this shows that your SEM is now in exclusion mode.
- With your SEM in exclusion mode, activate the inclusion process for your z-wave light switch – typically done with a button located on it – and you’ll be ready for enrollment! If unsure about how to put your specific z-wave device into inclusion mode, refer to its installation manual.
Now, normally once the device has been successfully cleared, the LED L2 light will illuminate.
Add the Z-Wave light switch
Now that the Z-Wave device is cleared, you can start the enrollment process.
- Press and hold the Z-Wave button on the SEM until the LED L2 begins flashing in groups of four. This indicates that the SEM is now in its inclusion mode.
- Then activate the inclusion function on the Z-Wave device in the same way as Step 1. The LED L2 light will illuminate solid, indicating that a Z-Wave device has been added.
Test your Z-Wave Switch
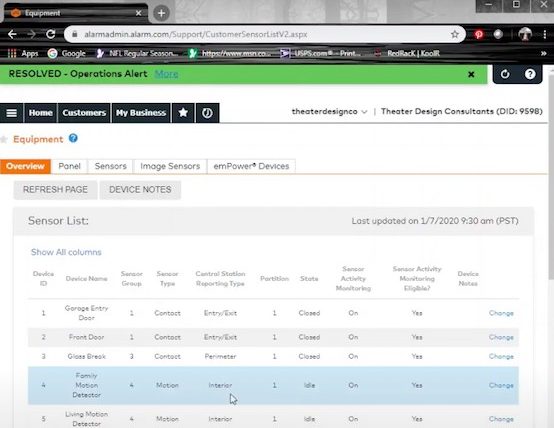
To make sure everything is correctly set up, check Alarm.com and make sure the new Z-Wave light switch is displayed under the “Automation” tab. Test that you can successfully control the device from Alarm.com. Also, don’t forget that you can link the Z-Wave device with various Smart Scenes if you wish to.
The Z-Wave Light Status Feature
It’s exactly what it sounds like. It allows you to look at the status of the Z-wave lights that you have learned in to your Alarm.com system. Now, in order to look at the status of the light, you do have to have automation enabled on your alarm.com account. So you need to speak to your monitoring company if you’re looking at adding that automation feature onto your plan. Once you have the automation added, you can actually go look at the status of your Z-Wave lights, toggle them on or off.
How many Z-Wave Lights can I add?
The limit for Alarm.com is 10 normal Z-wave lights. This does not mean you can’t add more Z-Wave lights. For example, if you moved into a house and you already have 20 Z-Wave normal lights throughout the house, you can still add all of them to your system and to your Alarm.com account. However. what you won’t be able to do is view all 20 of them.
Alarm.com has a limit of up to 10 normal Z-Wave lights or non-certified lights that you can actually view the status on. Let’s just stick with a 20. If those are all normal Z-Wave and their non-certified by alarm.com, you can only view 10 of those. You can actually toggle through the app which ones you want to view.
Checking Light Status on the Alarm.com App
Now let’s take a look at how to actually look at the Z-Wave light status feature on the alarm.com app, as well as how you can toggle that for the uncertified lights if you have more than 10 of them. And if you have the certified Z-Wave plus lights, keep in mind that those are not taken into accounts in terms of the maximum Z-Wave lights limit that alarm.com allows.
So one important thing, if you do have more than 10 of the uncertified Z-Wave lights, keep in mind only the status of 10 of those uncertified Z-Wave lights will show up on the alarm.com. You can actually toggle them on or off, so you can select which ones you want to show, which ones you don’t want to show.
If you have the certified Z-Wave plus lights that are actually linked and listed in the list below, you can actually go ahead and confirm those lights. And if you do have any of those, just ignore the 10 limit I mentioned earlier, and you can have up to 50 of them and they’re all gonna show the Z-Wave lights status feature.
Also, important to not here is that you can only edit the Z-Wave light status feature for the uncertified lights through the website. instead the Alarm.com mobile app.
So if you’re doing this on your phone through the mobile app, you may need to open up a web browser and go to alarm.com and log in using your credentials. You can also do it through a computer. Also, keep in mind that editing the Z-Wave light status feature will not work through the app.
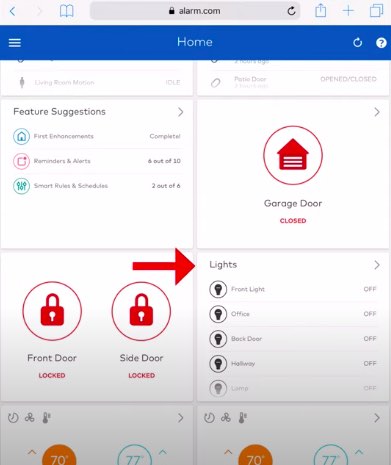
- Log in to your account on alarm.com website
- Scroll down to “Light “tab.
- On that light box. Hit the arrow key (‘ >’ icon on the top right of the box).
You’ll be able to see your lights listed on there.
One important thing to also notice is whenever you go to edit the toggle switch for the Z-wave light status feature, if you have more than 10 uncertified lights, the toggle switch will only show if you have more than 10.
4. Next, click the little gear icon go and toggle the Z-wave light status feature to on or off.
Yours could be on “only remote commands enabled”. But normally what you would see if you have more than 10 uncertified Z-wave lights is the light status feature.
 Now this is very important. Why? Because if you have more than 10, the ones that do not have the light status feature enabled, you will never know if those are actually on or off. So whenever you just hit the toggle button to turn them on or off, you don’t actually know what status they’re in. So only 10 uncertified lights will be allowed to show the status feature. And you will only see the toggle available if you have more than 10. If you don’t have more than 10, that toggle won’t even show up.
So that’s how you edit it through the app. And again, it’s all limited to the amount of Z-Wave devices that your panel can hold, which is usually like in the hundreds depending on what alarm system you have.
Now, as I mentioned below, we actually do have a list in which you will find the certified and uncertified light switches.
Alarm.com Certified real-time status
Below are the “certified real-time status” Z-Wave Plus lights for Alarm.com:
Jasco/GE:
- Jasco Plug-in Wireless Smart Dimmer (28166, 28170) (GE 28167 also supported)
- Jasco Plug-in Smart Switch (28172, 28168) (GE 28169 also supported)
- GE/Jasco Plug-In Outdoor Smart Switch (14284/14311)
- Jasco In-Wall Wireless Smart Switch (14318) (GE 14291 also supported)
- Jasco In-Wall Smart Toggle Switch (14319, 14293) (GE 14292 also supported)
- Jasco In-Wall Smart Dimmer (14321) (GE 14294 also supported)
- Jasco In-Wall Smart Toggle Dimmer(14322, 14296) (GE 14295 also supported)
- Jasco Enbrighten Smart A19 LED Bulb (39723) (GE 35931 also supported)
- Jasco or GE/Enbrighten In-Wall Smart Paddle Switch (46562 or 46201)
- Jasco or GE/Enbrighten In-Wall Smart Toggle Switch (46563 or 46202)
- Jasco or GE/Enbrighten In-Wall Smart Paddle Dimmer (46564 or 46203)
- Jasco or GE/Enbrighten In-Wall Smart Toggle Dimmer (46565 or 46204)
- Jasco or GE/Enbrighten Plug-in Outdoor Smart Switch (14325 or 14298)
Linear/GoControl/Nortek:
- WD500EMZ5-1
- WD1000EMZ5-1
- WS15EMZ5-1
- WS15Z5-1
- WD500Z-1
- WT00Z5-1
Alarm.com Compatible Non-real-time status
The lights listed below have been tested and will work with Alarm.com, but do not provide “real-time status” and do count against the 10-light limit:
Leviton:
- Leviton In-wall Switch (DZ15S)
- Leviton In-wall Dimmer (DZ6HD – 600W)
- Leviton Plug-in Outlet (DZPA1)
- Leviton Plug-in Dimmer (DZPD3)
- Jasco Enbrighten Smart LED Bulb A19 (39723)
- Jasco In-Wall Dimmer Toggle (14322, 14296)
- Jasco Dimmer Switch Toggle (14319, 14293)
Read more: https://www.alarmgrid.com/faq/how-do-i-add-a-z-wave-device-to-my-alarm-dot-com-sem