In this post, we’re going to show you how to install a Hampton Bay ceiling fan.
First, to install one of these you’re going to need some tools for this job and I’m going to show you what tools you need.
You’re going to need a drill, screwdrivers(a large square head, a small square head, and the flat head), wire strippers, a voltage tester and a knife. Also, you’re going to need a ladder.
Let’s go! On the box where there is a graph that shows what size fan you need for a particular size room.
Let’s go ahead and open the box. Let’s go ahead and take everything out of the box.

Let’s go ahead and get steady on the box where there is a graph that shows what size fan you need for a particular size room.
Let’s go ahead and open the box and take everything out of the box.
Now as you can see this fan also comes with instructions, but you can just rely on our how to post and get the job done! The next thing you want to do is you want to come down to your breaker box and you want to find the particular breaker to shut that power off.
So the next thing you’re going to want to do is to locate your wire. Go ahead and strip the casing on this wire just pull the casing back cut the casing all right so next just go ahead and strip your wires let’s just break her up now we already turn the breakers off for these wires and so we already know that there’s no power going so it’s okay.

So after you make sure again that the breaker is turned off and that the dangerous parties that are turning them on while you’re working are removed from the job site, you can continue the next step is to remove the screws that are in your electrical box.
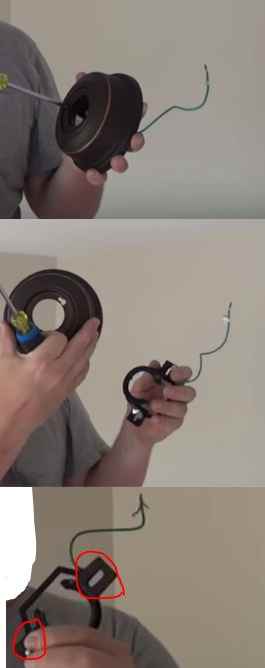
Here now in this particular fan kit we got the Hampton Bay Winthrop you’ll have a bracket assembly it looks like in the picture. This piece here unlocks off like in the shown in the pictures.
You want to take a head screwdriver and remove the screw just one screw and then just loosen the other one because this will just unlock it as you see here.
So the two screws that you already removed out of your electrical box will be the screws that go into the small holes (encircled in red in the picture) and then attach the bracket to your electrical box in the ceiling.
Our bracket is now installed. What am I supposed to do next? Oh we’ve got all our parts arranged on the floor.
There’s this pin that goes through here so we’re going to take this out take and take the pin out. Now you can go ahead and feed your wires and your cable through the trim piece. What we want to do is we wanna put the trim pieces in their place one over the other.
Then you take your pin and it will slide into this hole and it will connect all the stuff and hold all this stuff together.
What we want to do next is you want to fix the safety cable to one of the screws that are inside of the box there then tighten that screw around your cable.
All right, now that our safety cable is attached you can let that fan hang there now and it will make it a lot easier for doing your wiring just make sure you’ve got plenty of slack here and just cut off any excess wire.
Go ahead and strip your wires. So in this application, our red wire is the fan and our black wire is the light so you’re going to want to wire nut your blue wire to black and your black wire to read.

I like to take and attach the ground wire to my box first and then I attach it to my ground around a screw there which is good and tight. Hampton Bay provides you with three wire nuts.
All right then you want to take and push these wires and up out of your way into the box. Our piece here goes up and locks that onto our screw and you take our other screw that took out earlier and screw it back.
The trim piece will have two little screw slots and it will actually lock right on to our screw pads. Our main motor has been installed onto the fan blades.

Alright, our fan blades are assembled and ready to install, you will need to decide which finish you want if you want the darker finish the show or the lighter finish.
So you would want to place your bracket face on the side of the finish you want showing.
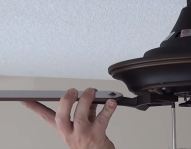
So put our bracket on the side of the finish you want showing. Make sure they’re good and snug so that when you’re sleeping in bed at night you don’t get a fan blade in the face. Next, we want to install our fan blades onto our fan motor.
So now all of our fan blades are installed and the next thing we want to install is our light kit bracket. Now there are three screws attached to this ring. You need to loosen two of them and remove the third you want to push your wires through this hole. These screw holes will attach two screws that we just assumed tighten them.
Now you can connect the wire harnesses. There are three screws up there. Remove one and loosen the other two. You don’t want the edge of this to be cutting any of your wires or rubbing against them. So this plugs into your light kit wire harness. And then take our third screw and elbow here.
Next you want to install your light bulbs and then your lampshade, and your ceiling fan installation is now complete!
Turn your breaker back on try it out and make sure it works. Also, make sure the light works. We hope that we’ve helped you!
Source: https://www.youtube.com/user/shanegoodfilms/videos
